How to make blueberry jam
(Neil, Yukon)
First you need to find your blueberries.
Blueberries thrive in open, heath-like, boggy spots that get plenty of
sunshine. In these parts, they are usually ready to pick in late summer / early
autumn.
By the way, if you've only ever had
bluberries from a supermarket, there's no comparison with the real thing.
Whilst cultivated berries are huge and beautifully formed, they taste of
nothing, are pappy and usually rubbish. Wild blueberries are sweet, tart,
bursting with flavour but much smaller then their insipid, larger cousins.
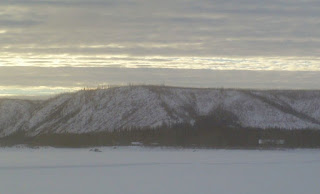
 |
| Yukon blueberries |
Before you set off picking you need to
assemble your blueberry equipment and suitable clothing. You can get pretty
chilly on an exposed hillside. Also, anything you wear as well as your hands,
face, knees etc. are going to end up covered in deep purple stains from the
juice. Some deep bowls for picking are good and then bring along some fairly
big, but not too deep, Tupperwares with lids to store the berries for
transport. Not too deep otherwise the blueberries will get squashed under their
own weight. Not a problem if you're immediately going to turn them into jam but
an issue if you want to keep them for a while or you want to eat some whole.
How are you going to pick them? By hand is
often best unless you are a ham-fisted ogre. Friends swear by berry pickers -
scoops with plastic or metal prongs and a container at the back. I've never got
on so well with them. You'll need patience, persistance and I'd always pack
some bear spray too. Bears eat a lot of berries...
Ready, steady, pick
Once you've found your spot you'll (hopefully) start to see hundreds of velvety, blue/purple mini-grapes hanging low off the ground. Time to get on your knees and start picking. Berry picking is strangely all-consuming and you can easily find yourself locked into the activity. It must relate back to some DNA memory of an earlier age when we would have been out picking berries as the gathering bit of hunter-gatherers. Do try and break out of that rhythm every now and again to cast a glance around. It's good to check where you are, where your berry-picking companions are and if any grizzly is getting piqued you're picking her lunch. After an hour or two you should have a pretty good haul even if there are just a couple of you picking.
Once you've found your spot you'll (hopefully) start to see hundreds of velvety, blue/purple mini-grapes hanging low off the ground. Time to get on your knees and start picking. Berry picking is strangely all-consuming and you can easily find yourself locked into the activity. It must relate back to some DNA memory of an earlier age when we would have been out picking berries as the gathering bit of hunter-gatherers. Do try and break out of that rhythm every now and again to cast a glance around. It's good to check where you are, where your berry-picking companions are and if any grizzly is getting piqued you're picking her lunch. After an hour or two you should have a pretty good haul even if there are just a couple of you picking.
One other tip, keep a base camp for your
sealed containers, spare clothing etc. in an easily-identifiable location
(beside a distinctive tree or rock) it's very easy to lose track of your
belongings and spend ages hunting over a hillside for your hat or sunglasses
when you should be gathering.
 |
| Homer looking for our bowls and jackets |
Sorting out the chaff
Even the most seasoned berry-picker can't avoid also picking leaves, stalks, spiders, moths, other berries etc. so the next stage when you're back home is to sort through your haul and divide the berries from the chaff into a clean receptacle. This process will also ensure that you and anyone in the near vicinity are again splattered in blueberry stains. Then you can just eat the berries or measure them out to make your jam.
Making the jam
If you're making jam you need to mash up the berries for your cup measurements. This is extremely satisfying, pounding a wooden spoon into a mug or other suitable receptacle to turn the plump berries into a muddled deep burgundy sludge.
- Pour 6 cups of this super sludge into a big pan
- Add 2 tablespoons of lemon juice
- Plus 4 cups of sugar (I don't like it too sweet, so add more if you want and it will help it set better)
- And a packet of pectin
Heat on your woodstove until it gets to a rolling boil. This involves expending a huge amount of wood, burming your legs as you have to keep stirring it and generally super-heating your cabin to sauna-like temperatures. Sterilise some preserving jars with lids and screwtops ready to pour the jam into or you can use jam jars with cirlces of greaseproof paper under their screwtop lids. We pour boiling water into the jars and over the lids which seems to do the trick.Once it's at a rolling boil, that you can't stir down, let it boil for 6-8 minutes. Stir constantly so it doesn't catch on the bottom of the pan and burn.
And into the jars
When the jam mixture has boiled for the right duration, ladle it carefully into the jars leaving about 1/8" gap between the jam and the lid. Seal each one immediately. Be careful not to splash yourself with the superheated, sticky jam. Wear washing up gloves or even oven mitts. You'll probably need an oven mitt to seal the jars as they rapidly become red hot. Unless you have asbestos hands.
 |
| Me looking pleased with the end product |
The lids will give a satisfyicng 'ping' as
they cool and the vacuum seals the jar tightly. If any don't seal properly,
just eat this jam first as it could go mouldy without a proper seal. Leave it
somewhere cool for 24 hours to set. If it hasn't set, use it as syrup and
declare that's what you were making anyway.
So that's how we made blueberry jam (and it's totally delicious especially on freshly baked sourdough bread).
So that's how we made blueberry jam (and it's totally delicious especially on freshly baked sourdough bread).


Comments
Post a Comment